

1. Starting a new survey
You always create a survey within the context of a client. Navigate to the company, go to Surveys in the left-hand navigation panel, and click New survey. Creation happens through a wizard that guides you step by step through the setup. At the start, you choose how to begin:- Start from scratch — start from an empty survey and build everything yourself.
- Start from template — start from a pre-assembled structure from the Library. Some blocks will already be present, ready to adjust.
2. Step “Details”: the basic settings
In the first step, you set the general properties of the survey.Main info
Languages
For a multilingual survey, the first block is automatically a language-selection menu for the respondent.
Benchmarks
At survey-creation time, three benchmarks are available to enable (at least one is required):The Trend benchmark (comparing against a previous round) isn’t selectable here — it only becomes available once a client has multiple survey rounds, in the company dashboard. See the Company Analysis guide.
Placeholders
Once a survey is active or closed, most fields in this step are locked. Move the survey back to draft first to edit them.
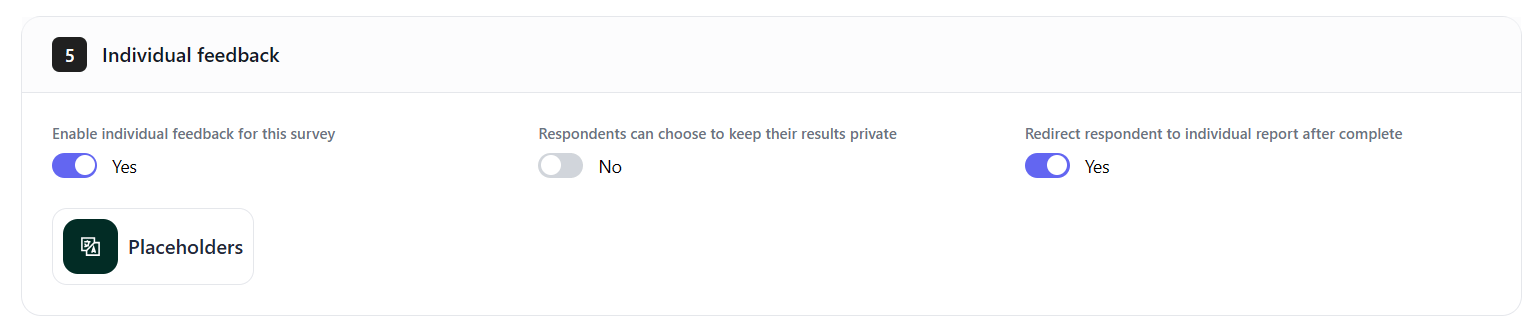
Individual feedback (DIF)
This section only appears when you start from a template that already has an individual report linked to it — it’s not part of a from-scratch survey’s Details step. See the Custom Reporting guide for what an individual report contains.
3. Step “Questions”: building the survey with blocks
In the second step, you assemble the content by combining blocks. Click Select block to open the side panel. The available blocks are grouped into four categories.A new survey isn’t always completely empty: if the client already has company-wide socio-demographic questions configured, those are added automatically, alongside the automatic language-selection block for multilingual surveys. Check the block list before assuming you’re starting from a blank slate.
3.1 General blocks
- Info block — a text block with formattable content (e.g. a welcome message or instructions). The respondent can easily pass this.
- Disclaimer block — the respondent must actively agree before continuing. Ideal for privacy or consent text. There can only be one disclaimer block per survey.
3.2 Socio-demographic blocks
Socio-demographic blocks identify groups within your respondents (e.g. department, age). You have two options:- Preset socio-demographic questions — choose from existing, predefined questions.
- Custom socio-demographic questions — create your own question with a caption, an optional subcaption, an optional dashboard label, and your own answer options. For each answer option, you can set a targeted number of respondents. Custom questions can be open-answer (free text) instead of fixed options — useful when the groups aren’t known in advance (e.g. “which team are you on?” in a fast-growing org). Open-answer socio-demo responses can still be used as a dashboard filter.
Company-wide socio-demographic questions stay in sync automatically: if you edit one at the company level, existing surveys that already use it pick up the change — you don’t need to update each survey individually.
3.3 Module blocks
Module blocks pull existing content from the Library. You can search and filter, and read more information about each block before adding it. There are three levels:- Questions — add individual questions from a module.
- Modules — add a full module (a group of questions around one theme).
- KPIs — add all modules of a KPI at once.
When you add a KPI whose module is already in the survey, the platform detects the overlap and warns you about duplicate modules.
3.4 Custom question block
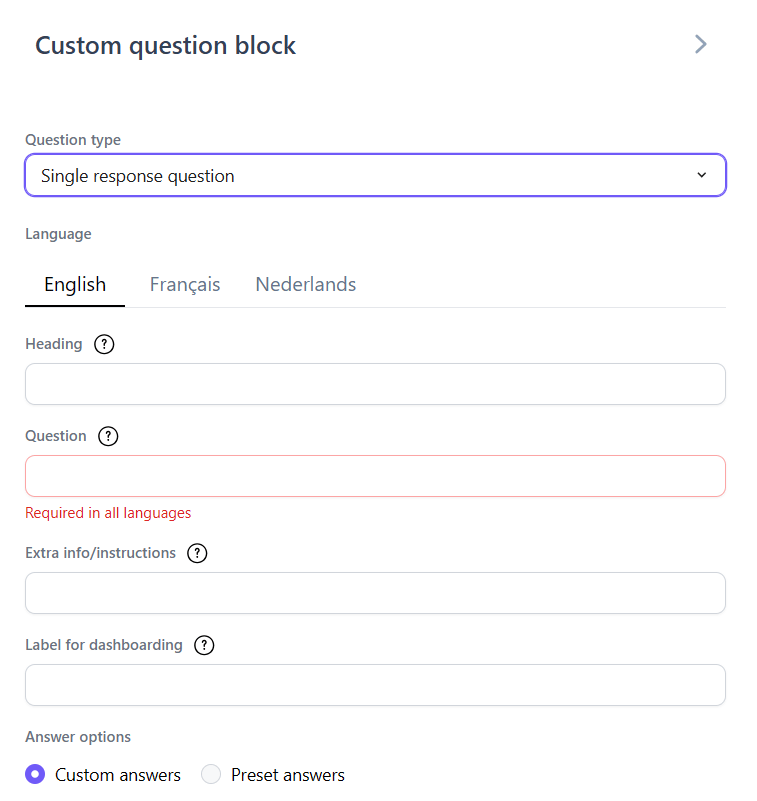
Custom question blocks are for ad-hoc, survey-specific questions that don’t exist in the Library. See section 4 for the available question types.Custom questions need to be added in all survey languages.
Managing and reordering blocks
You can edit or delete each block. You manage the order by simply dragging blocks around.Once routing logic has been configured, you can no longer reorder blocks by dragging. From that point on, you manage the order through the Routing tab.
4. Question types
For a custom question block, you choose the question type. Wenite supports the following types:Common settings
For most question types, you can configure:- Heading — an optional larger heading line shown above the question.
- Question — the question text itself (required in all languages), plus an optional Extra info/instructions line and a Label for dashboarding (a short label used on the dashboard).
- Optional — the respondent may skip the question.
- N/A option — a “not applicable” choice.
- Score interpretation (Positive/Neutral/Negative) — determines how the answer feeds into the 0–100 score. Defaults to Neutral; for negatively-framed items (e.g. burnout), set it to Negative so a higher raw answer still reads as a worse score.
5. Step “Routing”: logic and branching
By default, a new survey follows a single path: all questions are visible to all respondents, with all answer options shown. Use the Routing subtab to refine this path with logic.5.1 Limiting answer options
Click the checklist icon on a block to add conditional logic that hides or shows certain answer options, based on previous answers. You can add one or more filter rules. With multiple rules, choose whether all conditions must be met (AND) or only one (OR).5.2 Routes and branching
Use the Default route button, or drag a line from the end of one block to the start of another, to create new routes. As with limiting answer options, you use answer rules to determine which route a respondent takes, depending on their answers.A survey must have exactly one clear start point and one clear end point. If the routing is incomplete or incorrect, a warning appears and you won’t be able to save the survey.
6. Testing a survey
Before you distribute a survey, it’s best to review it from the respondent’s perspective. Open Test from the survey’s action menu (···) — a test link opens automatically in a new tab.Responses to a test survey do not appear in the results dashboard.
7. Editing a survey and managing its status
A survey goes through three statuses, which you change via the action menu (···):8. Exporting the structure
Use Export structure in the action menu to have the platform generate an Excel overview of the full survey (question text, answer options, logic). Useful for sharing the structure with a client for approval.9. Generating demo data
Want to show what a filled-in dashboard looks like? Click Generate Data in the action menu. Enter a number of respondents (up to 100) and a seed value (so the same generated data can be reproduced later if needed), and the platform fills the survey with fictitious answers.A survey with generated data can no longer receive real responses. Use this only for demonstration or testing purposes.
10. Recommended workflow
- Start smart — start from a template if a suitable one exists; otherwise start from scratch.
- Set the details first — name, languages, default language, benchmarks, and placeholders. Fill in placeholders completely right away.
- Build the structure — add an info or disclaimer block first, then the socio-demographic questions (company-wide where relevant), then the module and/or custom blocks.
- Add logic last — lock in the block order first, since you can no longer drag blocks around once routing is configured.
- Test the survey via the test link and check every path.
- Optional — generate demo data to showcase the dashboard, but never on the survey you’re actually going to send out.
- Activate the survey and continue with distribution (see the Distributing a Survey guide).